How do I install the Matomo tracking code in Tag Rocket for BigCommerce
Tag Rocket for BigCommerce is a tagging solution that streamlines data collection across major ad platforms like Google, Facebook, and Microsoft. It includes support for Matomo Analytics through the app integration to enhance conversion tracking and remarketing.
This guide explains how to integrate Matomo and Tag Rocket for BigCommerce. Before tracking, ensure compliance with data privacy regulations by obtaining user consent where required.
Requirements
Before you start, make sure you have a valid Matomo account with active tracking configured for your website, and admin access to a BigCommerce account linked to the same website.
Install and configure the Tag Rocket App
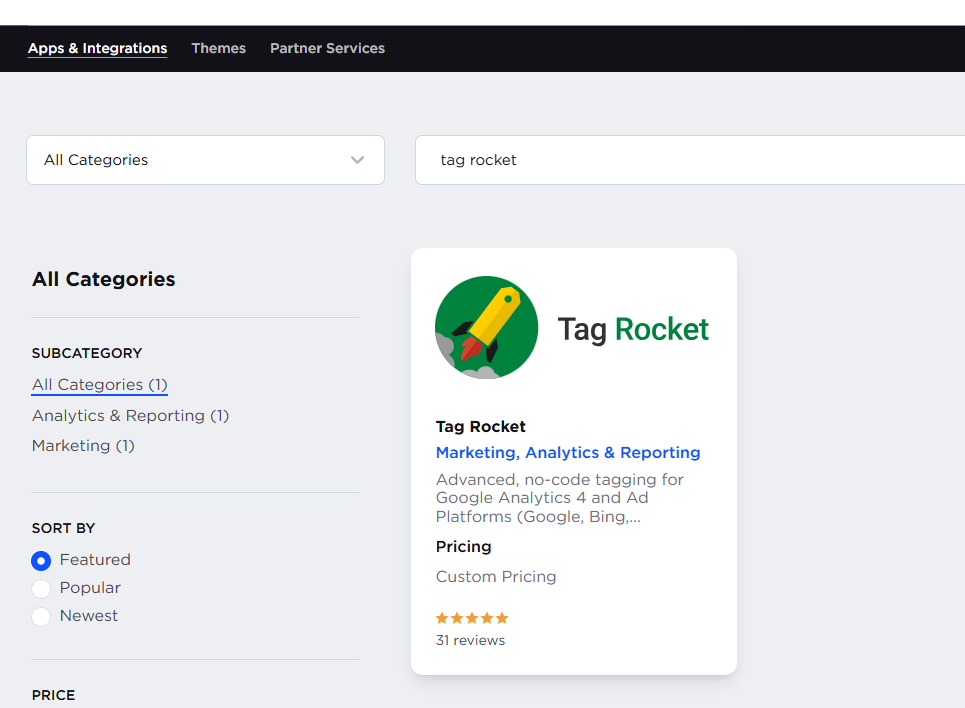
- In your BigCommerce admin account, navigate to Apps & Integrations.
- Search for Tag Rocket and install the app.
Enable Tag Rocket API events
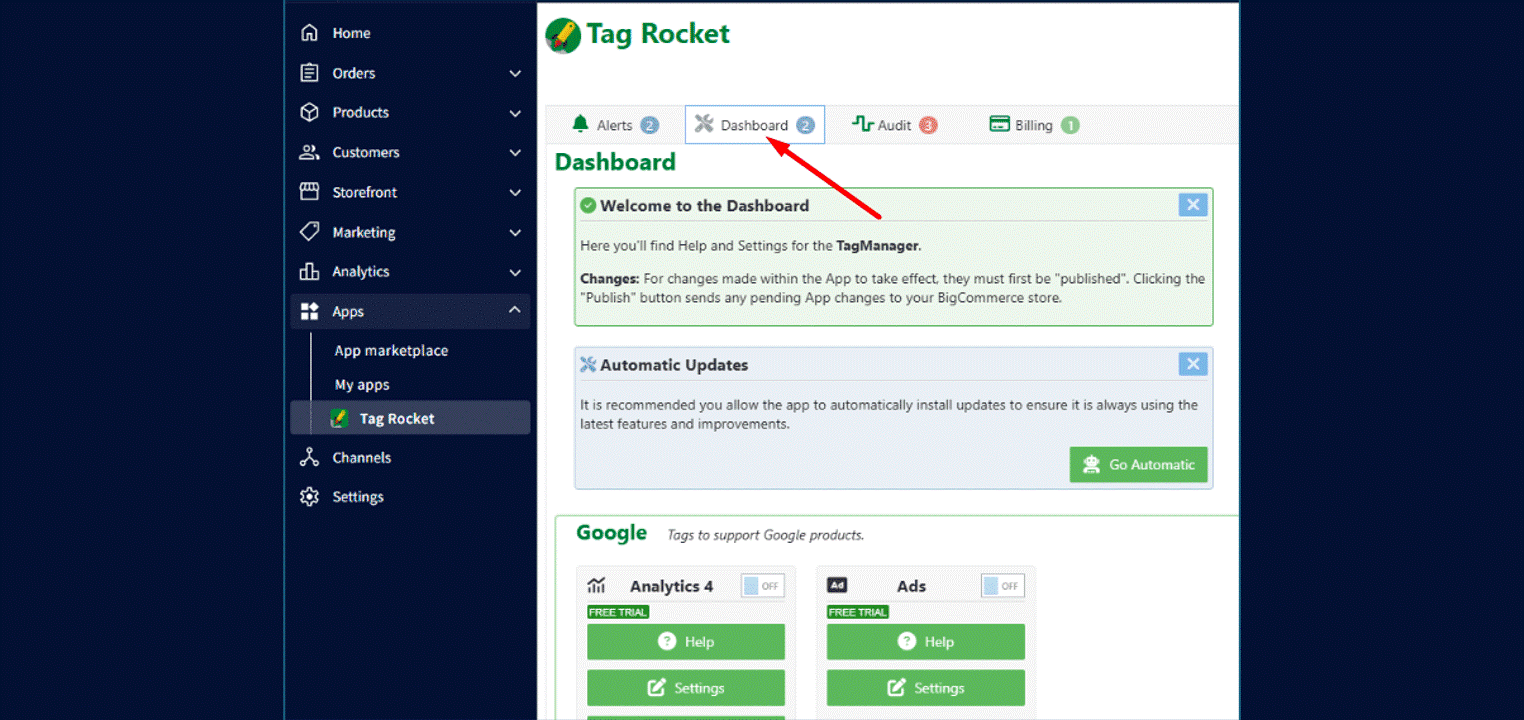
- In BigCommerce, go to Apps > Tag Rocket.
- In the Tag Rocket dashboard, scroll down to the Administration section.
- Navigate to Global Tag Values and click Settings.
- Enable Fire All Events. ⚠️This is critical — without it, Tag Rocket will not send events for the Matomo script.
- Click Finish Editing to save your changes.
- Go back to the Tag Rocket dashboard and click the (Publish or) Republish button at the top right. This will apply the changes to your store.
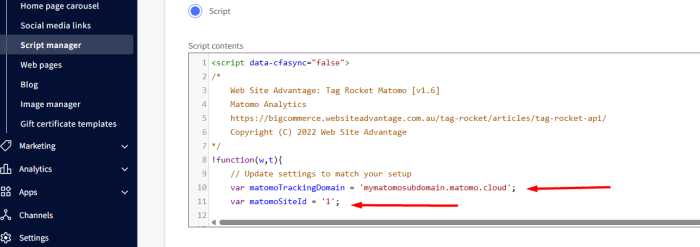
Add the Matomo tracking script
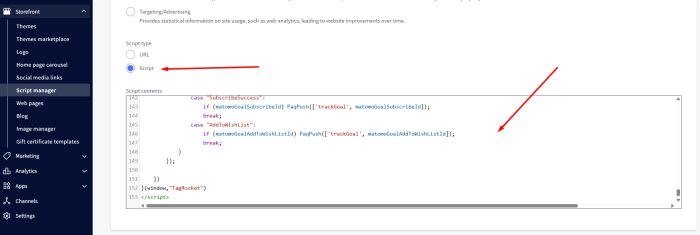
- In your BigCommerce admin, navigate to Storefront > Script Manager.
- Click Create a Script to add a new one.
-
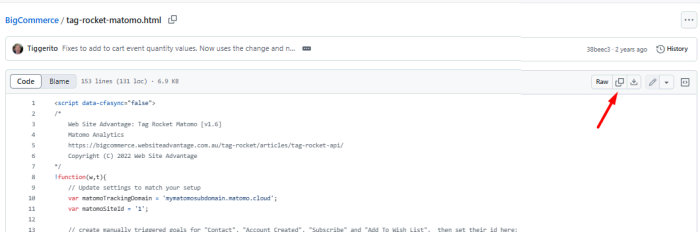
Copy the script for Matomo tracking from the BigCommerce – Tag Rocket official repository:
-
In BigCommerce Script manager, select Script as the Script type.
- Paste the copied code into the Script Content area.
Customise the Matomo tracking script
- At the top of the script, update the following placeholders with your Matomo account details:
var matomoTrackingDomain = 'your-matomo-subdomain.matomo.cloud';
var matomoSiteId = 'your-site-id'; - Replace with your Matomo subdomain and the Site ID for your website in Matomo. For example, if your Matomo subdomain is example.matomo.cloud and your site ID is 3, update the script accordingly.
Validate the configuration
Once these steps are complete, your Matomo tracking should be active. This includes pageviews across all pages and eCommerce events. To validate the integration, make sure tracking is not blocked by consent settings, ad blockers, or browser privacy features.
- Open your website and perform test actions.
- Navigate to your Matomo dashboard and view the Visits in real-time widget to verify your website visit appears in the log.
- Check your Tag Rocket reports are capturing the relevant interactions.
If you experience any issues, double-check the following:
- The Tag Rocket app is correctly installed and configured as outlined in the instructions above.
- The API and Fire All Events setting must be enabled.
- The script is correctly configured with your Matomo URL and site ID details.
- The script is placed in the Header and set for All pages.
Once Tag Rocket and Matomo are integrated, explore Matomo reporting tools to analyse your Ecommerce and campaign performance, track user behaviour, and uncover optimisation opportunities.
Happy Analytics!
Disclaimer: The use of any third-party tools (plugins, extensions, platforms, APIs, widgets, etc.) is at your own risk. Matomo does not own, control, maintain or support any third-party tools that integrate with our product. We recommend checking your privacy setup is correctly configured across your environment when using any third party tools.