Configure Privacy Settings in Matomo
This guide explains the privacy implications of tracking your visitors’ web analytics data, and how Matomo can easily be configured to ensure that your users’ privacy is respected.
Matomo ensures the privacy of your users and analytics data. When using Matomo, YOU keep control of your data, nobody else does. Your data is stored in your own MySQL database, and logs or report data will never be sent to other servers by Matomo. Learn more about Privacy.
To ensure further security, after you have installed Matomo, we recommend that you:
- make your Matomo server more secure by undertaking a few extra security checks
- follow the guide below to enable important Privacy features
By design, Matomo ensures that your analytics data is only accessible to the Matomo administrator, meaning it is completely secure. This guide will explain how to easily configure your favourite web analytics tool to fit your privacy compliance requirements.
The majority of privacy settings within Matomo can be found by navigating to Administration ![]() > Privacy while logged in as Superuser.
> Privacy while logged in as Superuser.

Step 1) Automatically Mask or Anonymise Visitor IPs and do not collect or replace User IDs
Masking vs. Anonymisation: Key Distinction
- Masking an IP address means removing or obfuscating part of it (e.g., deleting the last few bytes) to reduce identifiability.
- Anonymisation means irreversibly altering the data so that it can never be linked back to an individual, even with additional information.
Truly anonymised data is no longer personal data and is not subject to GDPR. However, masked data is often still personal data because it may still be re-identifiable.
Masking/anonymisation options in Matomo
By default, IP masking is enabled in Matomo. This means Matomo stores in the database each new visitor IP address (IPv4 or IPv6 format) with the last components removed to protect user’s privacy. Masking or fully anonymising IP addresses is a good way to protect users with static IP addresses. Otherwise, their browsing history would be easily tracked across several days and even across websites tracked within the same Matomo server.
IP addresses also identify the specific network a user comes from and reveal approximate geographic location data, often down to the level of a single individual.
To ensure that you do not store the full visitor IP, which is classified as personal data under GDPR, go to Matomo > Administration ![]() > Privacy > Anonymize data to enable IP masking or anonymisation. Check that you have 2 bytes or 3 bytes masked from the IP address.
> Privacy > Anonymize data to enable IP masking or anonymisation. Check that you have 2 bytes or 3 bytes masked from the IP address.
- Click Anonymize Visitors’ IP addresses so a green tick is shown.
-
Select how many bytes of the visitor’ IPs should be masked by clicking the option you want so that a green bullet is shown. Some countries may also regulate the number of bytes you need to remove before an IP is considered anonymised. The default setting is 2 bytes masked, but in some jurisdictions, you may need to mask 3 bytes for stronger privacy. Matomo also provides the option to remove the IP address by fully masking it and storing it as 0.0.0.0.

-
The next step is to select whether the anonymised IP address or the full IP address is used for Geolocation.
- If you select Yes, (which is recommended for the privacy-focused configuration of Matomo), you will use the masked IP address for geolocation and consequently, the location accuracy will be reduced.
- If you select No for this setting, you choose to use the full IP address for geolocation. Please be aware that you are still processing complete IP data and make sure you let users know this within your privacy policy, and provide a link to the privacy policy of any third parties that you use to process data.
- Click the green Save button to update your settings.
The steps above will mask (or anonymise, depending on the level) all IP addresses from the moment you enable those settings.
Pre-existing data: If you have already been using Matomo for any length of time, there is a chance you have existing personal data such as visitors IP addresses or User IDs stored. In this case, you should also anonymise your existing data. Refer to this guide on anonymising past data in Matomo.
Note: If you choose not to mask or anonymise IP addresses, it is essential that you understand privacy law requirements that apply to you, determine the legal basis for processing the IP address, and, if required, obtain user consent before capturing their IP addresses.
If you are subject to both the GDPR and the ePrivacy Directive (as implemented in your jurisdiction):
Under GDPR, an IP address is personal data when it can be linked to an individual. This means that its processing must be justified under one of the legal bases in Article 6(1) GDPR.
If an IP address is used solely for security purposes (e.g., fraud detection, abuse prevention, server logs for cybersecurity), consent is not required, provided that:
- The processing is strictly necessary for the security of the service,
- It meets the legitimate interest test (including a balancing assessment), and
- The data is not used for any additional purposes beyond security.
If an IP address is processed for analytics or tracking, it must have a valid GDPR legal basis. Legitimate interest may be difficult to justify for tracking or analytics unless strict safeguards are in place, and in many cases, consent may still be required.
The ePrivacy Directive applies only when storing or accessing data on a user’s terminal device (e.g., cookies, local storage, fingerprinting). Since an IP address is passively transmitted via an HTTP request, ePrivacy rules do not apply to its collection alone. However, if the IP address is combined with other tracking technologies, such as cookies or browser fingerprinting, then ePrivacy consent requirements apply. National laws implementing the ePrivacy Directive may impose additional requirements if other tracking methods are involved, so compliance should always be assessed in the relevant jurisdiction.
Geolocation Considerations when IP masking
IP addresses are used by Matomo for identifying where users come from. If you are not interested in finding out where your users are visiting from, you can safely anonymise 3 byte(s) in the process above which provides the most privacy. However, if you are interested in a visitor’s location you have two options:
-
Privacy Prioritised Geolocation: Set the number of bytes to 1 bytes(s) (more accurate geolocation) or 2 byte(s) (less accurate geolocation) and then select Yes (higher privacy, lower geolocation accuracy) to use the masked IP address for enriching visits.

-
Accuracy Prioritised Geolocation: Select any number of byte masking options to mask the IP address within your database, but select Noto use masked IP addresses when enriching visits. It means Matomo will use the full IP address for location tracking. This provides more accurate geolocation data but processes full IP addresses, which may require user consent.

Important: Even with IP masking, geolocation may still be able to infer a user’s general location. If IPs are linked with other data sources, they may still be considered personal data under GDPR.
Does IP Anonymisation work with IPv6?
Yes! While the examples above are shown in IPv4 format, it is worth noting that IP anonymisation works with newer IPv6 addresses too.
Avoid collecting User IDs
If you want to minimise the amount of personal data you process using Matomo or want to use it in a CNIL consent-exempt way, make sure that User IDs are not collected.
By default, Matomo does not measure the User ID. To verify that the User ID is not used on the site, go to Matomo > Visitors > User IDs. The report should say “There is no data for this report.”

Replace User ID with a pseudonym
If you choose to process User IDs, we strongly recommend you pseudonymise them to enhance privacy.
While you are masking IP addresses, there is another setting within this section that allows you to Replace User ID with a pseudonym if you are using Matomo’s User ID feature. The Matomo User ID feature can be a very powerful tool if users log in to your website. It can track their activity across devices and visits by tracking a unique user ID while visitors are logged in.
When you enable the option to Replace User ID with a pseudonym, the User ID will be replaced by a pseudonym to avoid directly storing and displaying personally identifiable information such as an email address.
- In technical terms: given your User ID, Matomo will process the User ID pseudonym using a salted hash function. Replacing a User ID with a pseudonym is not the same as anonymisation.
- In GDPR terms: the User ID pseudonym still counts as personal data. The original User ID could still be identified if certain additional information is available (which only Matomo and your data processor has access to).
User IDs are inherently personal data and you will likely require consent. This is true even if you replace them with a pseudonym. Therefore, the biggest benefit to pseudonymisation of User IDs is that it provides a level of privacy to website users when analytics data is reviewed. Below is a screenshot of the same visitor in the visit log before and after pseudonymisation.
Visit Log before pseudonymisation

Visit Log after pseudonymisation

If you would like to respect your user’s privacy while reviewing your website analytics, then there are three simple steps to enable this feature:
- Navigate to Administration
 > Privacy > Anonymize data.
 - Click Replace User ID with a pseudonym so a green tick is shown.
- Click the green Save button.
Step 2) Regularly delete old raw visitor data
To further reduce the storage of personal data, it is recommended to automatically delete old raw visitor logs.
In Administration ![]() > Privacy > Anonymize data, go to the section Regularly delete old raw data. You can configure Matomo to automatically delete your old raw data (old visitor logs) from the database. For privacy reasons, we highly recommend that you keep the detailed Matomo logs for only 3 to 6 months and delete older log data.
> Privacy > Anonymize data, go to the section Regularly delete old raw data. You can configure Matomo to automatically delete your old raw data (old visitor logs) from the database. For privacy reasons, we highly recommend that you keep the detailed Matomo logs for only 3 to 6 months and delete older log data.
Deleting old raw data also has one other important advantage: it will free database space which will, in turn, slightly increase performance.
If you run the automatic script as explained in the FAQ, it is safe to delete your old log data and still access all historical reports in Matomo.

Step 3) Include a Web Analytics Opt-Out Feature on Your Site
Note: Depending on privacy laws that apply to your website (e.g., GDPR/ePrivacy), you may be required to track only with consent (opt-in). If you want to or are required by applicable privacy laws to obtain user consent before tracking, you will need to ask for consent by following the steps in Implementing tracking consent in Matomo before any tracking commences. The opt-out function described below should be used only when opt-in is not required or consent exemption applies.
On your website, in your existing privacy policy page or in the ‘Legal’ page, you can actually add a way for your visitors to “opt-out” of being tracked by your Matomo server. By default, all of your website visitors are tracked, but if they opt-out by clicking on the opt-out checkbox, a cookie mtm_consent_removed will be set. All visitors with an mtm_consent_removed cookie will not be tracked.
In Administration ![]() > Privacy > Users opt-out, you will be able to copy and paste the opt-out form code:
> Privacy > Users opt-out, you will be able to copy and paste the opt-out form code:

The opt-out form code solution is simple to use and recommended for almost every use. You can make the opt-out look great on your website by customising the Opt-out iframe colours and fonts (text colour, background colour, font size, and font family).
Below is the example opt-out form for the Matomo website. You can opt out from being tracked on matomo.org (you will need to disable any ad-blockers to see the example):

In cases where you need to customise more aspects of the opt-out form (for example change the opt-out text itself), you can implement a custom visitor opt-out form using JavaScript.
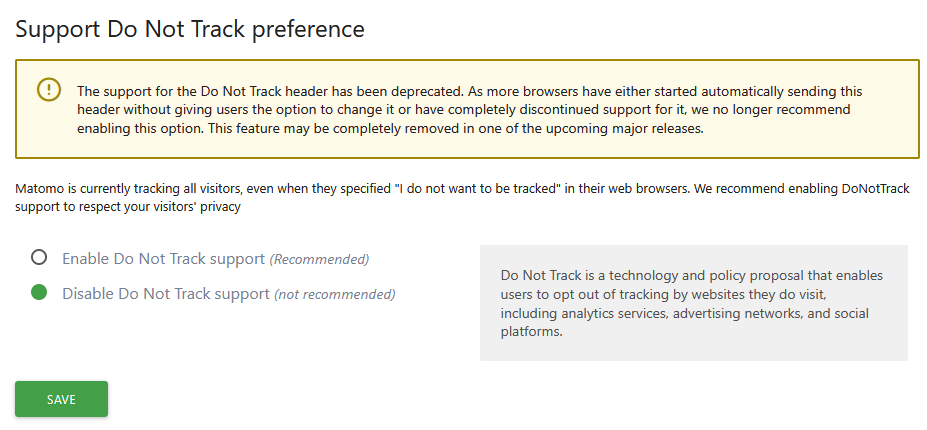
Step 4) Respect DoNotTrack preference
The support for the Do Not Track header has been deprecated. As more browsers have either started automatically sending this header without giving users the option to change it or have completely discontinued support for it, we no longer recommend enabling this option. This feature may be completely removed in one of the upcoming major releases.
Do Not Track is a technology and policy proposal that enables users to opt-out of tracking by websites they do not visit, including analytics services, advertising networks, and social platforms. For more information about DoNotTrack, check out donottrack.us.
In Administration ![]() > Privacy > Users opt-out, under Support Do Not Track preference, you can enable/disable Do Not Track support:
> Privacy > Users opt-out, under Support Do Not Track preference, you can enable/disable Do Not Track support:
Note: Tracking requests and cookies will still be created even for people who don’t want to be tracked. To prevent any requests and cookies when people don’t want to be tracked, add the following function in the JavaScript Tracking code: _paq.push(["setDoNotTrack", true]);
Finally, note that if your audience is widely using IE10, IE11, or Maxthon, then you will not track some of your audience because these older browsers have the DoNotTrack feature enabled by default for all users.
Step 5) Create or update the Privacy Policy and Cookie Notice on your website(s)
A Privacy Policy is a statement or a legal document that discloses some or all of the ways a party gathers, uses, discloses, and manages a customer or client’s data. It fulfills a legal requirement to inform your website visitors about your data processing and their data privacy rights. A Cookie Notice informs users about the cookies and tracking technologies used on your website, their purposes, and how users can manage their preferences, ensuring compliance with regulations like the GDPR and ePrivacy Directive.
When you use Matomo to track your visitors, we recommend updating your Privacy Policy and Cookie Notice to explain:
- how Matomo is used on your website,
- what data is collected and for what purpose,
- what cookies or similar tracking technologies are used; and
- if applicable, how users can opt out of tracking or manage their preferences.
We provide a Privacy Policy for Matomo users, which you may review and use as a template (headings, structure). We do not recommend you copy it directly, as privacy practices differ between organisations. Your privacy notice or policy must reflect and align with your organisation’s legal obligations and privacy practices. Matomo’s Cookie Notice is also available for your review.
Step 6) Learn about personal data regulations such as GDPR
To learn more about the privacy regulations and in particular the GDPR, please visit our GDPR Guide.
Or, navigate to Administration ![]() > Privacy > GDPR Overview to find details about awareness, documentation, individuals’ rights, security procedures, and data retention.
> Privacy > GDPR Overview to find details about awareness, documentation, individuals’ rights, security procedures, and data retention.
Step 7) Anonymising data that has already been tracked
When you have tracked data in the past and realised later you tracked maybe too much data or some personal data, you can easily anonymise the affected data using our tool to anonymise previously tracked raw data.
Step 8) How to track visitors in Matomo without using a cookie banner or asking for consent?
As part of privacy legislation worldwide including GDPR but also ePrivacy, it is often required to display a cookie banner informing users about cookies, or consent must be obtained before tracking visitors’ personal data.
Matomo supports privacy-friendly tracking setups that may not require consent in specific jurisdictions. Read more about using Matomo Analytics without a cookie banner or asking for consent.
Step 9) Anonymise Ecommerce Order ID
By default, Matomo stores your Ecommerce Order IDs to allow for closer analysis and to help prevent tracking duplication. However, because an Order ID can be cross-referenced with another system, typically an eCommerce shop, the Order ID constitutes personal data under the GDPR. If you prefer not to track personal data in Matomo, you may enable Anonymize Order ID to avoid storing the Ecommerce Order ID number. The steps to do this are:
- Go to Administration > Privacy > Anonymize data.
- Click Anonymize Order ID so a green tick is shown.
- Click Save.
When you enable this option, an Order ID will be automatically anonymised so no personal information will be tracked. It is important to note that if you enable this feature, in some cases duplicate orders may be counted if visitors refresh the order confirmation page, as there is no way to distinguish unique orders.
Step 10) Optional Privacy Preferences
There is more you can consider when it comes to privacy:
- As the Matomo administrator, you may decide that giving access to real-time & visits log features are not necessary for your team members who use Matomo. In this case, you can disable the visits log, real-time and visitor profile.
- If you track the number of websites with the same Matomo server, all your websites’ code will contain the Matomo server URL in the JavaScript code. To prevent other users from finding out all your websites, refer to this guide Hide the Matomo Server URL in your JavaScript using this technique.
Make sure that this does not affect your transparency obligations and is not used in a deceptive way. For example, ensure that you inform visitors:
We use Matomo Analytics to improve our website while respecting your privacy. To enhance security and protect our tracked websites, we route tracking requests through a proxy instead of exposing our Matomo server URL.
This does not affect your ability to opt out of tracking, and all consent and privacy controls remain fully functional.
You can learn more about how we use analytics and your rights in our Privacy Policy. - Many countries, particularly EU, UK, EEA require websites to obtain consent before setting cookies or other trackers. If your jurisdiction mandates this, you must ensure that Matomo cookies are only set after the user has given consent. If you wish to use cookieless tracking option in Matomo Cloud or On-Premise, you can disable all Matomo Cookies for particular visitors or for all visitors by calling a JavaScript function in the Matomo code, see the guide on How do I go cookieless (disable Matomo cookies) for a visitor?.
- You can also add Privacy Policy and Terms & Conditions links in Matomo for enhanced trust, transparency, and legal compliance across your platform and embedded widgets.
- In Matomo version 4 and above, you can anonymise referrer details to avoid accidentally collecting private data.
- In Matomo version 5 and above, URLs with the file:// protocol will not be tracked by default to avoid accidentally collecting private data. If needed this can be enabled within the JavaScript tracker.
- For reference the list of metadata and data points collected by Matomo is documented here.