Set up User ID tracking in WordPress
User ID tracking in Matomo links visits, actions, and conversions to a single identifier so you can recognise the same user across sessions, devices, and browsers. The User ID setup and configuration depends on how Matomo is implemented: either through the JavaScript tracking code, Matomo Tag Manager, the WordPress plugin, or one of the Matomo SDKs.
This guide covers how to set up User ID tracking in Matomo for WordPress.
Before you start
- You can set up the WordPress integration using the Matomo for WordPress plugin or the Connect Matomo plugin for Matomo Cloud or On-Premise. Tracking must be activated through the plugin settings.
- You will need a unique and persistent user identifier that represents each logged-in user and access to your WordPress admin settings. WordPress users can typically change their email address, but not their username. When choosing a unique identifier, select Username if you want the most reliable identifier.
- When using any personal identifier, it is recommended to update your Matomo privacy settings to use a pseudonym to replace the User ID for enhanced privacy. The User ID pseudonym is processed using a salted hash function.
- If you operate in a region with privacy or consent requirements, ensure that implementing User IDs is compliant and covered under valid consent before implementing this setup.
Matomo for WordPress: Enable User ID tracking
- Log in to your WordPress dashboard with an admin account.
- Hover over Matomo Analytics in the menu and select Settings.
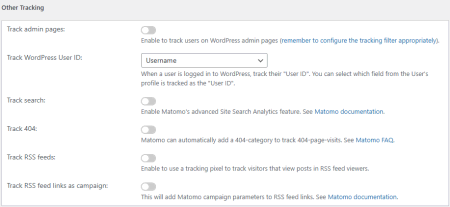
- Scroll down to the General Tracking Settings > Other Tracking section.
- Locate the Track WordPress User ID drop-down and select Username.
- Click Save Changes.
- Read the Verify User ID tracking section below to test the setup.
Connect Matomo (WP-Matomo): Enable User ID tracking
- Log in to your WordPress dashboard with an admin account.
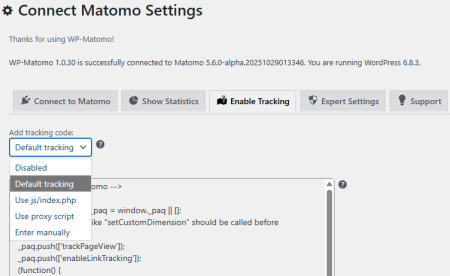
- Hover over Settings in the menu and select Connect Matomo.
- Click on the Enable Tracking tab and ensure the correct Add tracking code option is selected. If you manually define the tracking code, the User ID tracking setting will be unavailable.
- Scroll down to the User ID Tracking setting and select Username in the drop-down.
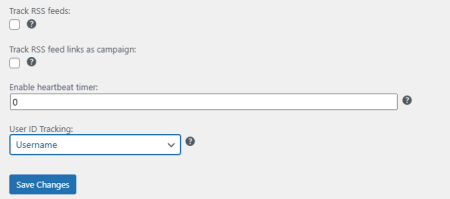
- Click Save Changes.
- Read the section below to test the setup.
Verify User ID tracking
After adding the User ID to your tracking code, verify that data is being sent and received correctly.
- Open your website, log in as a user and reload the page.
- If you’re using Matomo for WordPress, go to Matomo Analytics > Reporting.
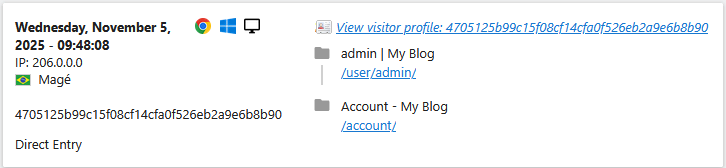
- If you’re using Connect Matomo, open Matomo and to to Visitors > Real-time and Visits Log.
- Your User ID should appear in the reports.
- To test tracking anonymous sessions, log out of your website and reload the page.
- In Matomo, the visit should not appear under a User ID in the Visits Log and Visitor Profile.
Once User ID tracking is configured, you can measure customer engagement, compare logged-in and anonymous behaviour, and analyse user journeys across all Matomo reports. Use the Reporting API, create and analyse Segments, track conversions, and include the User ID dimension.