Create, track and manage custom dimensions
There are two steps to tracking custom dimensions. The first stage is to create and define the dimension itself. You should plan ahead when creating custom dimensions as you can only have 5-15 for each scope (depending on the version of Matomo you use) and you generally can’t delete a dimension, only deactivate it.
The second stage is to start collecting the tracking data for the Custom Dimension. This later stage may require some custom configuration which will vary depending on what data you would like to pull in.
Creating a Custom Dimension: Two Types
- In Matomo, navigate to Administration
 > Websites > Custom Dimensions.
 - Custom dimensions can be edited by anyone having at least ‘Write’ or ‘Admin’ access for a specific website. For each website or app, different Custom Dimensions can be created.
Before creating a new Custom Dimension you have to choose whether you need a new dimension in scope Visit or Action.
Custom Dimensions: Visit Dimensions
Custom Dimensions in scope “Visit” can be sent along any tracking request and are stored in the visit of a specific visitor. If you set different values for a given “Visit” scope dimension during the lifetime of a visit, the last value set (in this visit) will be used. A typical example could be any device information or the version of the app the visitor is using.
Custom Dimensions: Action Dimensions
Custom Dimensions in scope ‘Action’ can be sent along any action (page view, download, event, etc.). A typical example would be for example to track a language along any page view, download or event.
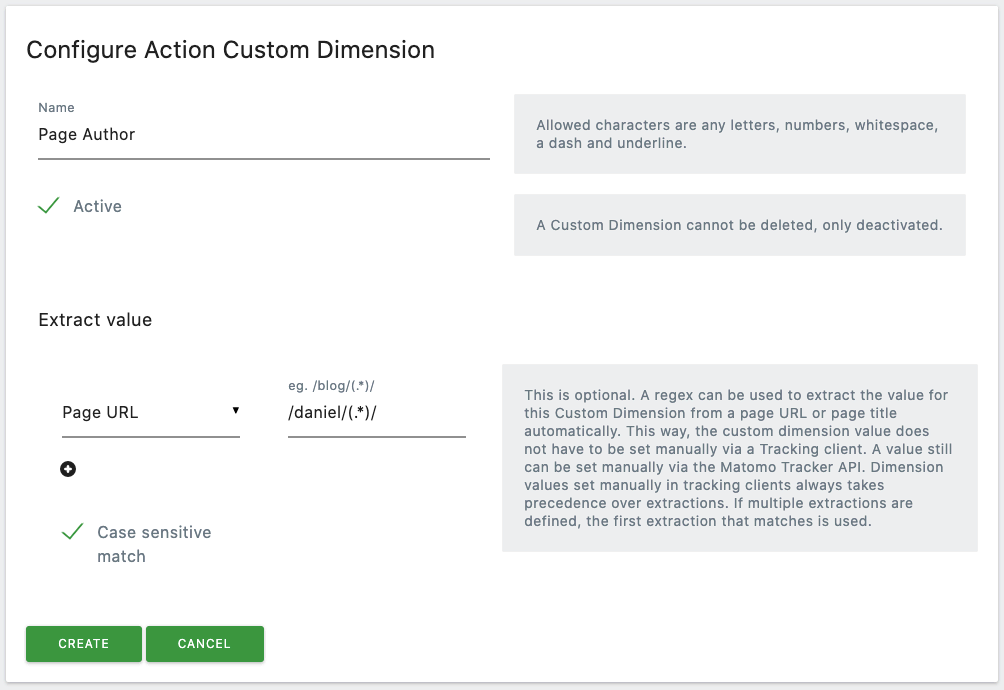
Within the Action scope configuration screen, there is also an option to set up URL Extractions so that you can trigger tracking of the dimension, simply by the page a visitor is on. If you don’t require this feature, you can simply ignore it.
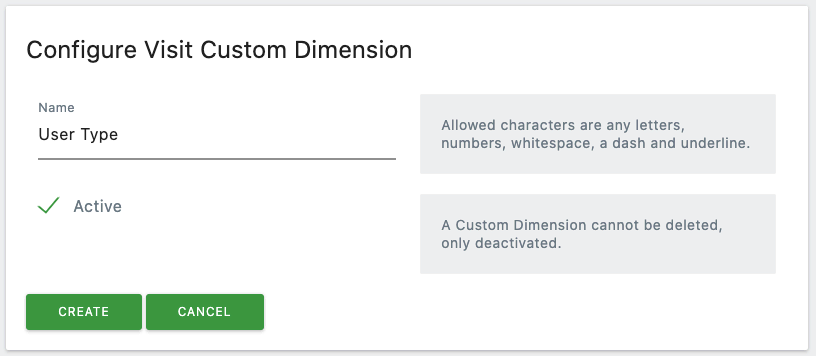
Whichever type of custom dimension you create, make sure that the Active checkbox is clicked, so that a green tick is shown as in the screenshots above and then hit the Create button to enable them.
Tracking a Custom Dimension
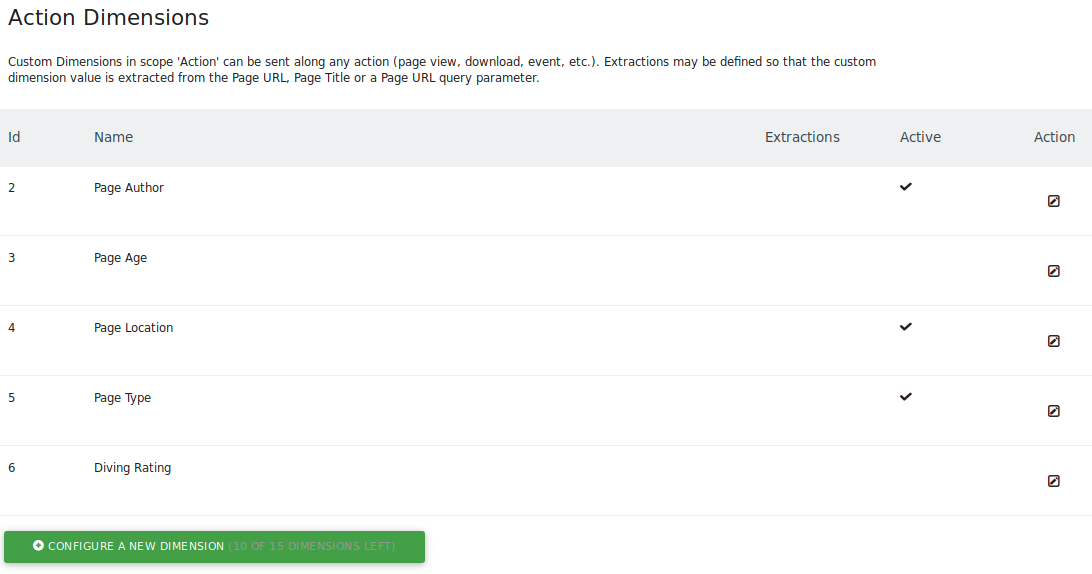
In general you can track any Custom Dimension via the JavaScript Tracker, the PHP Tracker or via the HTTP Tracker API. Some more trackers might support the tracking of Custom Dimensions as well. To find out how to track a specific Custom Dimension the easiest way is to go to the “Manage Custom Dimensions” screen. By clicking on the edit button you will find the tracking instructions:
![]()
As a simple example, using the table from the top of this guide, let’s assume we want to hard code the author name for some reason. We already see the Dimension ID is 2 for page author (see the figure, above), so the javascript you put in the page could be:
_paq.push(['setCustomDimension', 2, 'Matthieu']);
You could also use a variable to set this name of course.
You will likely need to use custom code to include the custom dimension value within the final parameter. We recommend reviewing the relevant developer documentation for your implementation at one of the links below:
- JavaScript Tracker – Custom Dimension Documentation
- PHP Tracker – Custom Dimension Documentation
- HTTP Tracker API – Custom Dimension Parameters
Managing a custom dimension
Using extractions to set a custom dimension value
Extractions may be defined for Custom Dimensions in scope “Action” so that the value is extracted from the Page URL, Page Title or a Page URL query parameter automatically instead of having to set it manually in your website or app.
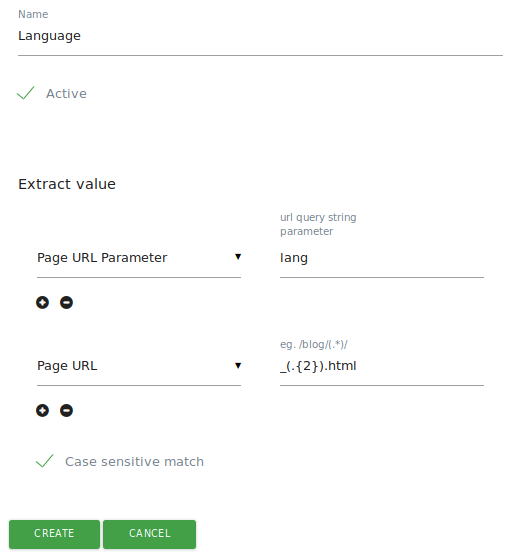
An example use case could be a Custom Dimension named “Language”. Matomo can automatically extract the language code from the URL during any tracking request (no tracking code is needed in the website or app).
To extract the value from a Page URL or Page Title you need to define a Regular expression with exactly one sub-expression (one ( followed by a )). For example if you want to extract the language en from page_en.html you could define the pattern page_(.{2}).html. Note that the pattern matches the whole page URL or page title.
Multiple extraction rules can be defined for one Dimension so if the first rule doesn’t match it will check the following rules and try to extract the correct value.
Check out our FAQ section for more details on how to use URL extractions with Custom Dimensions.
Deactivating a Dimension
If you decide that you no longer need to track a dimension, you can deactivate it, rather than delete it. Once you deactivate a Dimension the links in the menu will disappear, no value will be tracked for this Dimension and no report will be generated for it anymore. Once the Dimension is activated again everything will work as before and previously generated reports as well as raw log data will be still available.
- Log in to your Matomo with an admin account.
- Click on Administration in the top menu to visit the Settings section.
- Click Custom Dimensions within the main navigation on the left.
- Click the edit icon
 next to dimension you would like to deactivate.
 - Click the green checkmark so that it becomes an empty checkbox.

- Click the green Update button to save your changes and deactivate the dimension.